![iRADVC7000/9000s 1.Coating error 2.Coating failure at rear side of sleeve 3.Toner leaking[Cause] A.](/img/tmb/15/1407541/30d417e76d540f65bb39a2fe61007b93-720x.jpg "Презентация на тему iRADVC7000/9000s 1.Coating error 2.Coating failure at rear side of")


![3 filters that needs to be replaced regularly[1] Claw[2] Dust filter (FL2-8946)](/img/tmb/15/1407541/9b050affa448ffb3786bd415d3bb0498-720x.jpg "iRADVC7000/9000s")

![iRADVC7000/9000s 4.White band 5. White lines [Causes] A. Mixture of foreign material into the](/img/tmb/15/1407541/def6976be1cef84074925f120bd0f96c-720x.jpg "iRADVC7000/9000s")


side of sleeve
3. Toner leakage (Y, M)
4. Toner leakage
(Bk)No toner is applied on the rear side of sleeve cylinder.
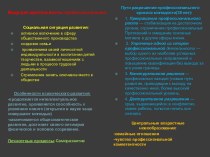
The front side of machine is soiled with toner including carrier. If the soiling gets worse, the front side of paper is soiled.
The front side of machine is soiled with toner including carrier. If the soiling gets worse, the front side of paper is soiled.
Need to replace the developing assembly
Clean inside the machine
Perform service work
Clean inside the machine.
Is the developing assembly heavier than the service part (new) developing assembly?
Same or lighter.
Wait and see
Yes
After shaking the developing assembly gently, execute STIR Bk inside the machine. As the result, the assembly lose weight.
Output 200 pages of PG 10 images.
Service work: Workflow
* Faulty images due to high voltage error are output
Images with solid area even in margins or images with toner (rough texture)
throughout the page is output.
*Replace the 1st transfer H.V. PCB ass’y (FM3-9590).
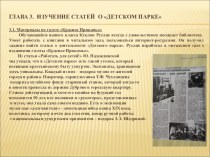
As the measure against the temperature rise inside the machine, place the machine far away from the wall as much as possible, and replace the 3 filters regularly.
- Distance between the rear side of machine and the wall: preferably 10cm or more
- Filter (3 filters) replacement intervals: every 500K images
B. Upgrade Dcon
Upgrade Dcon to ver59.01 or later. (The settings described in C in the next page take effect properly only with Dcon ver59.01 or later.)
*Output PG 10 images and replace the developing assembly at the same time. The symptom is not solved simply by replacing the 1st transfer H.V. PCB ass’y.
*PG10 image: Test image reproduced by
all the 4 colors (YMCK).
YES
NO
Does the symptom solved by outputting 200 pages of PG 10 images?